Retail Analytics Workshop
In this workshop, we will build an end-to-end, serverless pipeline that
- ingests data from PoS systems (simulated) as transactions happen,
- derive near-realtime insights (such as detecting anomalies),
- annotate ingested data with additional information (such as weather or other),
- store this data for long term records and historical analysis, and
- forecast future demand armed with this data.
Workshop Setup
Event Engine
We will use the purpose-built Event Engine to provision free AWS accounts that you can use for the duration of this workshop.
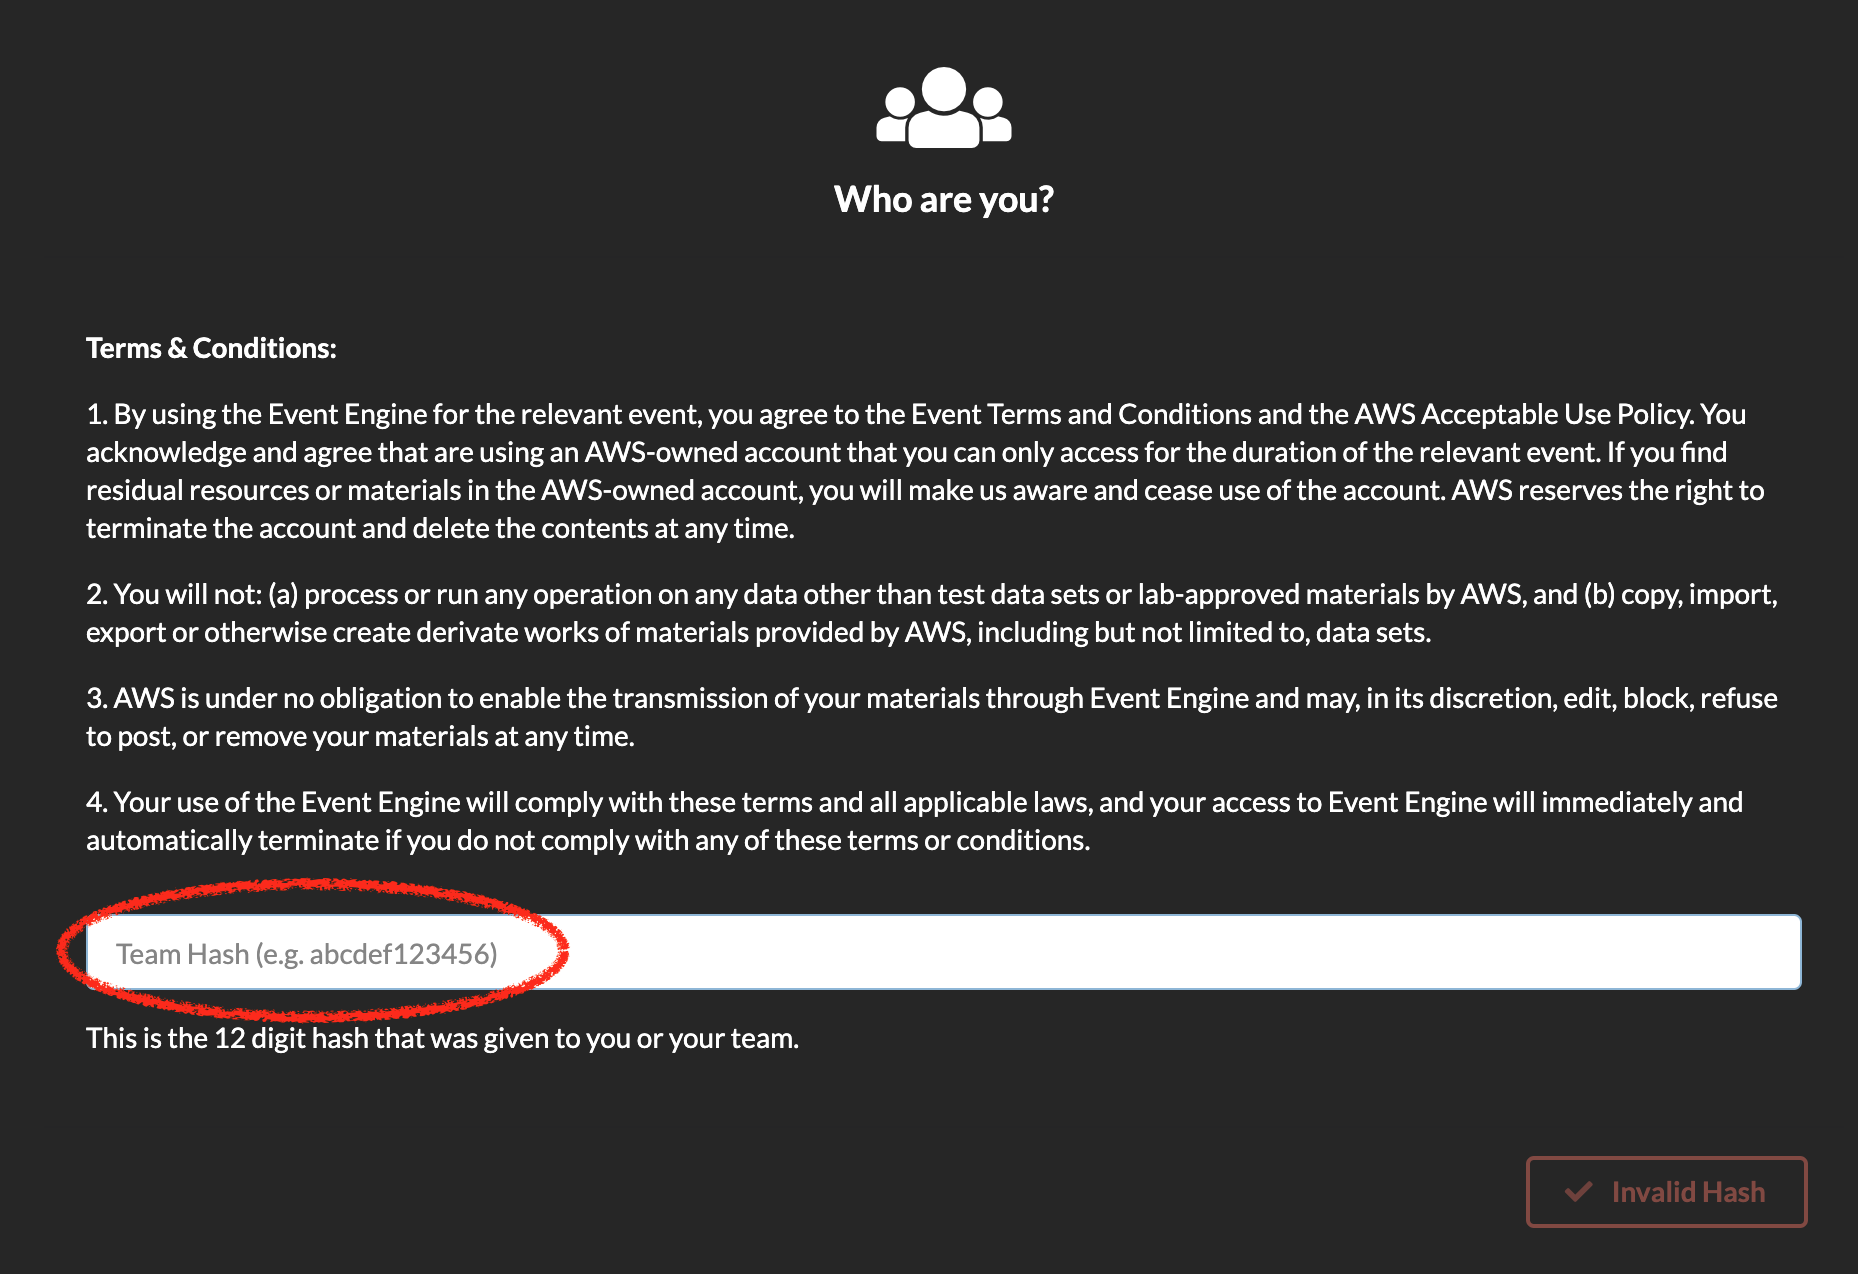
Head over to https://dashboard.eventengine.run.
Enter your participant hash and go to the next screen
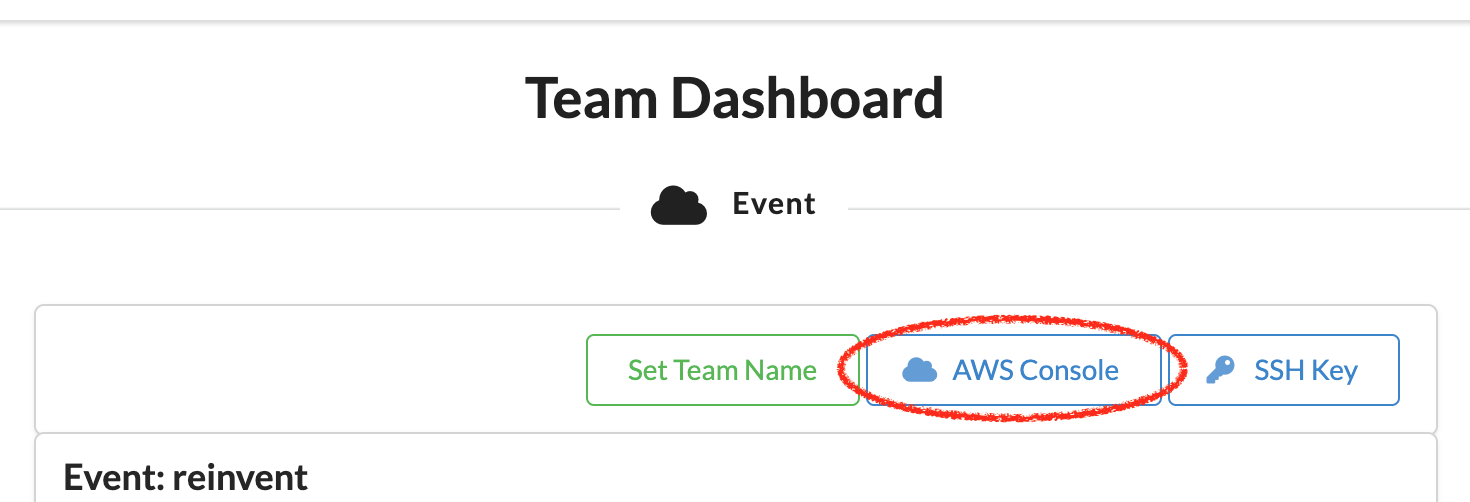
Click on ‘AWS Console’
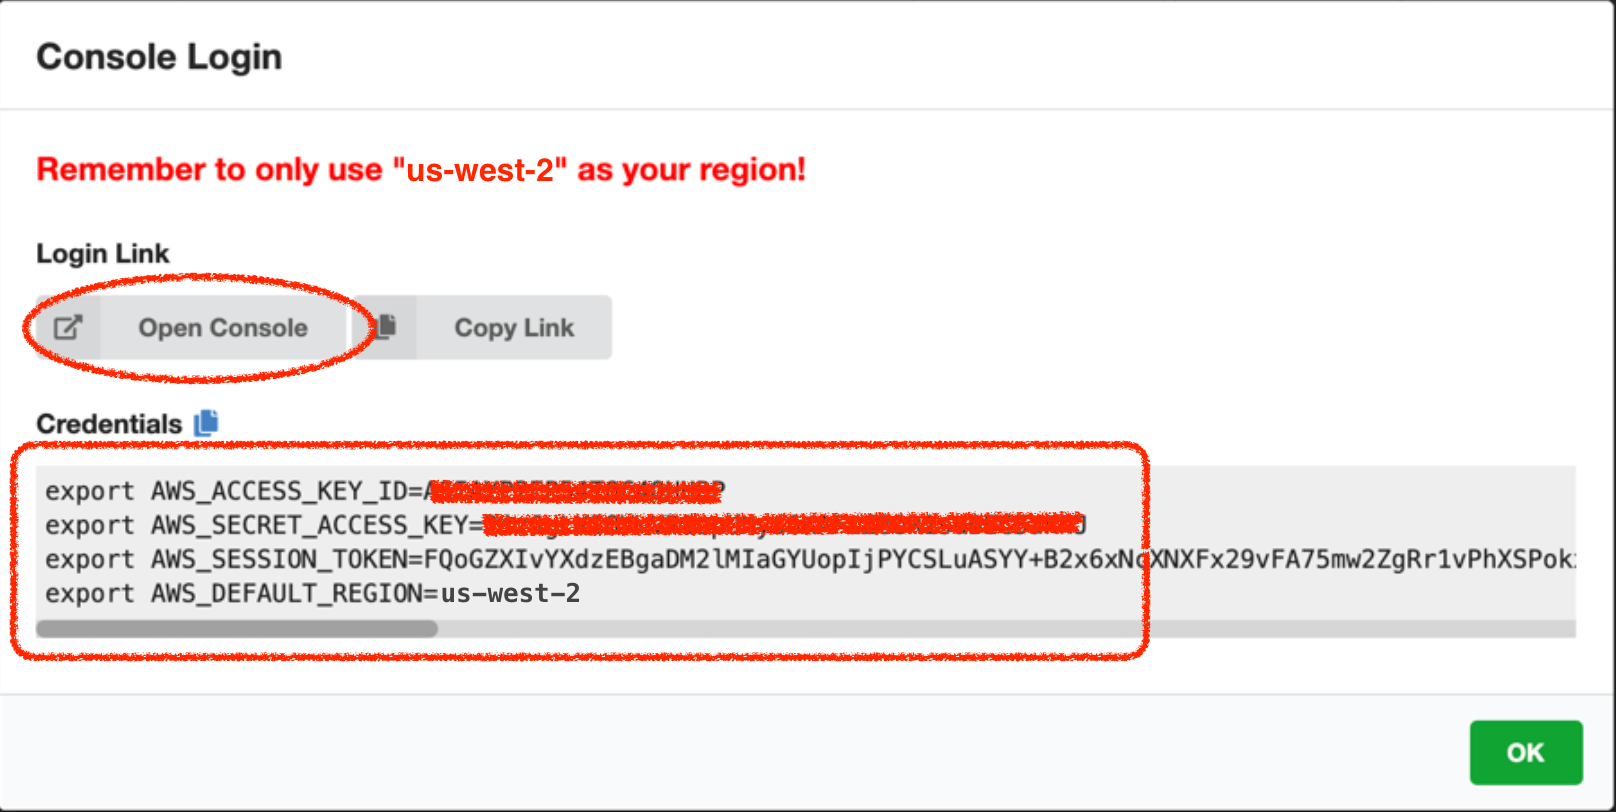
Copy-paste the Credential values into a Notepad so you have them for later. Specifically,
AWS_ACCESS_KEY_IDAWS_SECRET_ACCESS_KEYAWS_SESSION_TOKEN
We will refer to these interchangeably as AWS_ACCESS_KEY_ID or ACCESS_KEY_ID. And as AWS_SECRET_ACCESS_KEY or SECRET_ACCESS_KEY. And as AWS_SESSION_TOKEN or SESSION_TOKEN.
Regions
As of this writing, Amazon Forecast is supported in 6 regions (below), but the accounts provided in this Workshop default to Oregon.
Note If you’re using your own account, it is still recommended to use us-west-2 (script in lab1 uses us-west-2), but if you’re confident of replacing us-west-2 in the script with the region of your preference, feel free to choose any of the supported regions below. |
As a recommendation, use the free AWS account provided to you for this workshop and then perhaps work thru' the labs again in your own AWS account after this workshop to reinforce. The lab instructions will remain online for some time.
The free AWS accounts, however, are only for the duration of this workshop and will be shutdown shortly after.
| Region Name |
Region |
| US East (Ohio) |
us-east-2 |
| US East (N. Virginia) |
us-east-1 |
| US West (Oregon) |
us-west-2 |
| Asia Pacific (Singapore) |
ap-southeast-1 |
| Asia Pacific (Tokyo) |
ap-northeast-1 |
| EU (Ireland) |
eu-west-1 |
Create Cloud9 Environment
We will use a Cloud9 environment, which should have all of the most popular languages (Ruby, Python, NodeJS, Java, etc.) and many associated libraries already installed, to help save time and serve as a launch pad.
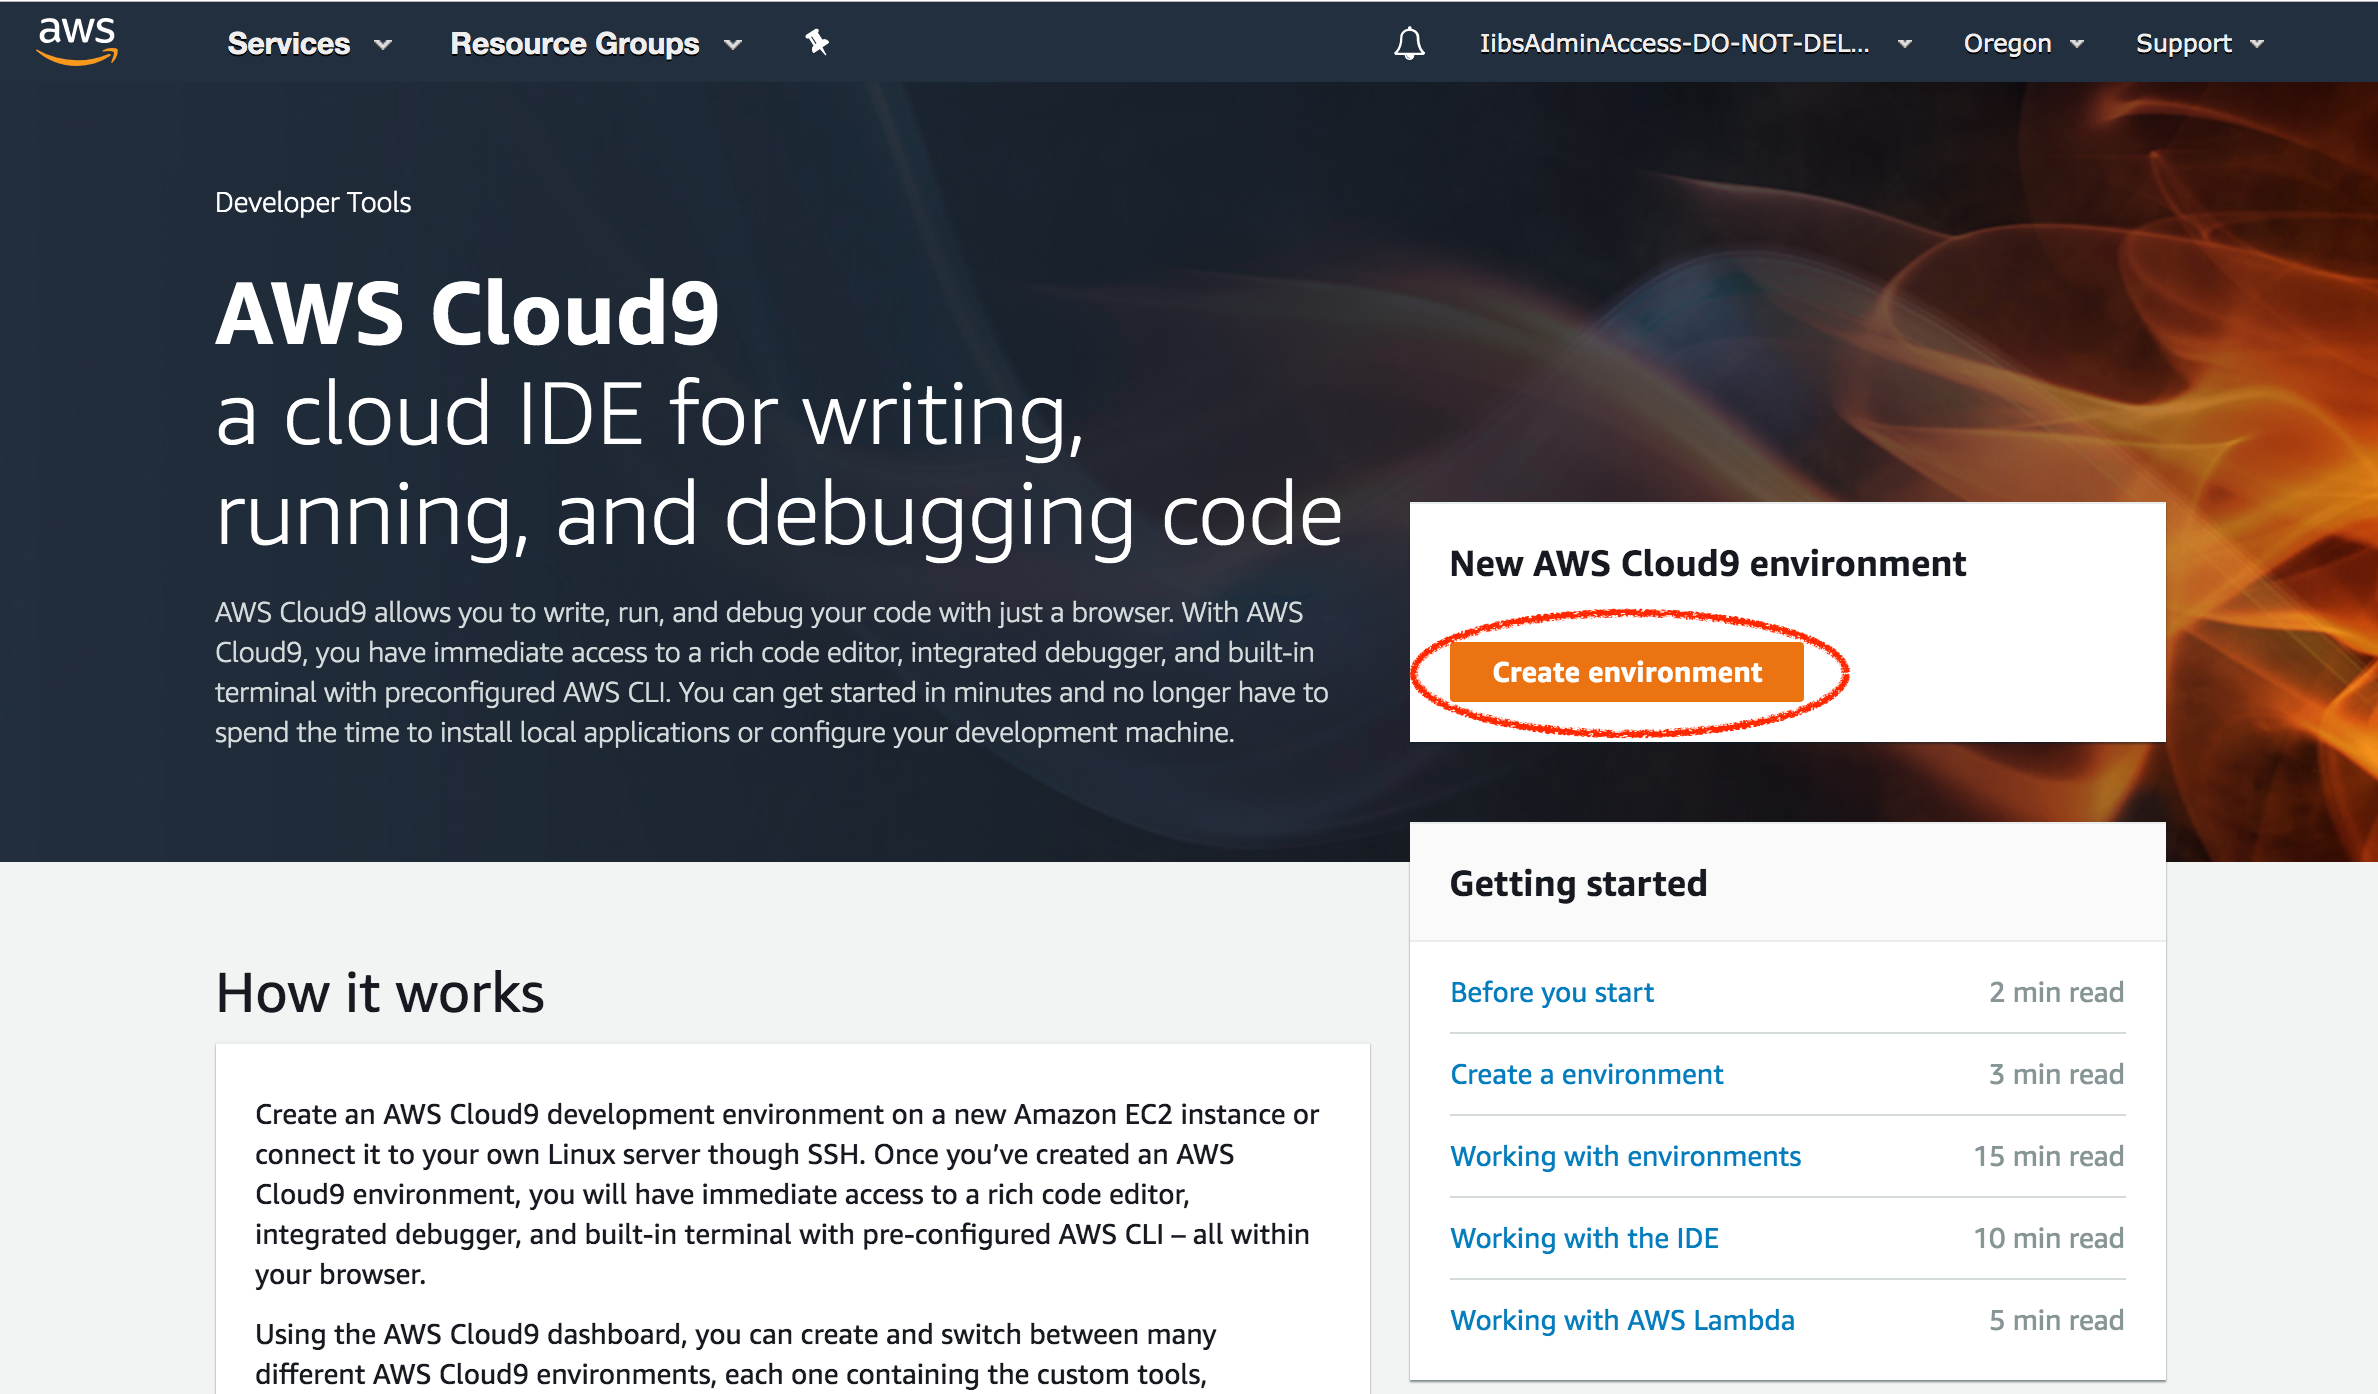
Point your browser to https://console.aws.amazon.com/cloud9
On the top right-hand corner, ensure that you’re in the Oregon region if you’re using the AWS account provided as part of this workshop.
If you’re using your own account however, choose one of the 6 regions above (Oregon still recommended).
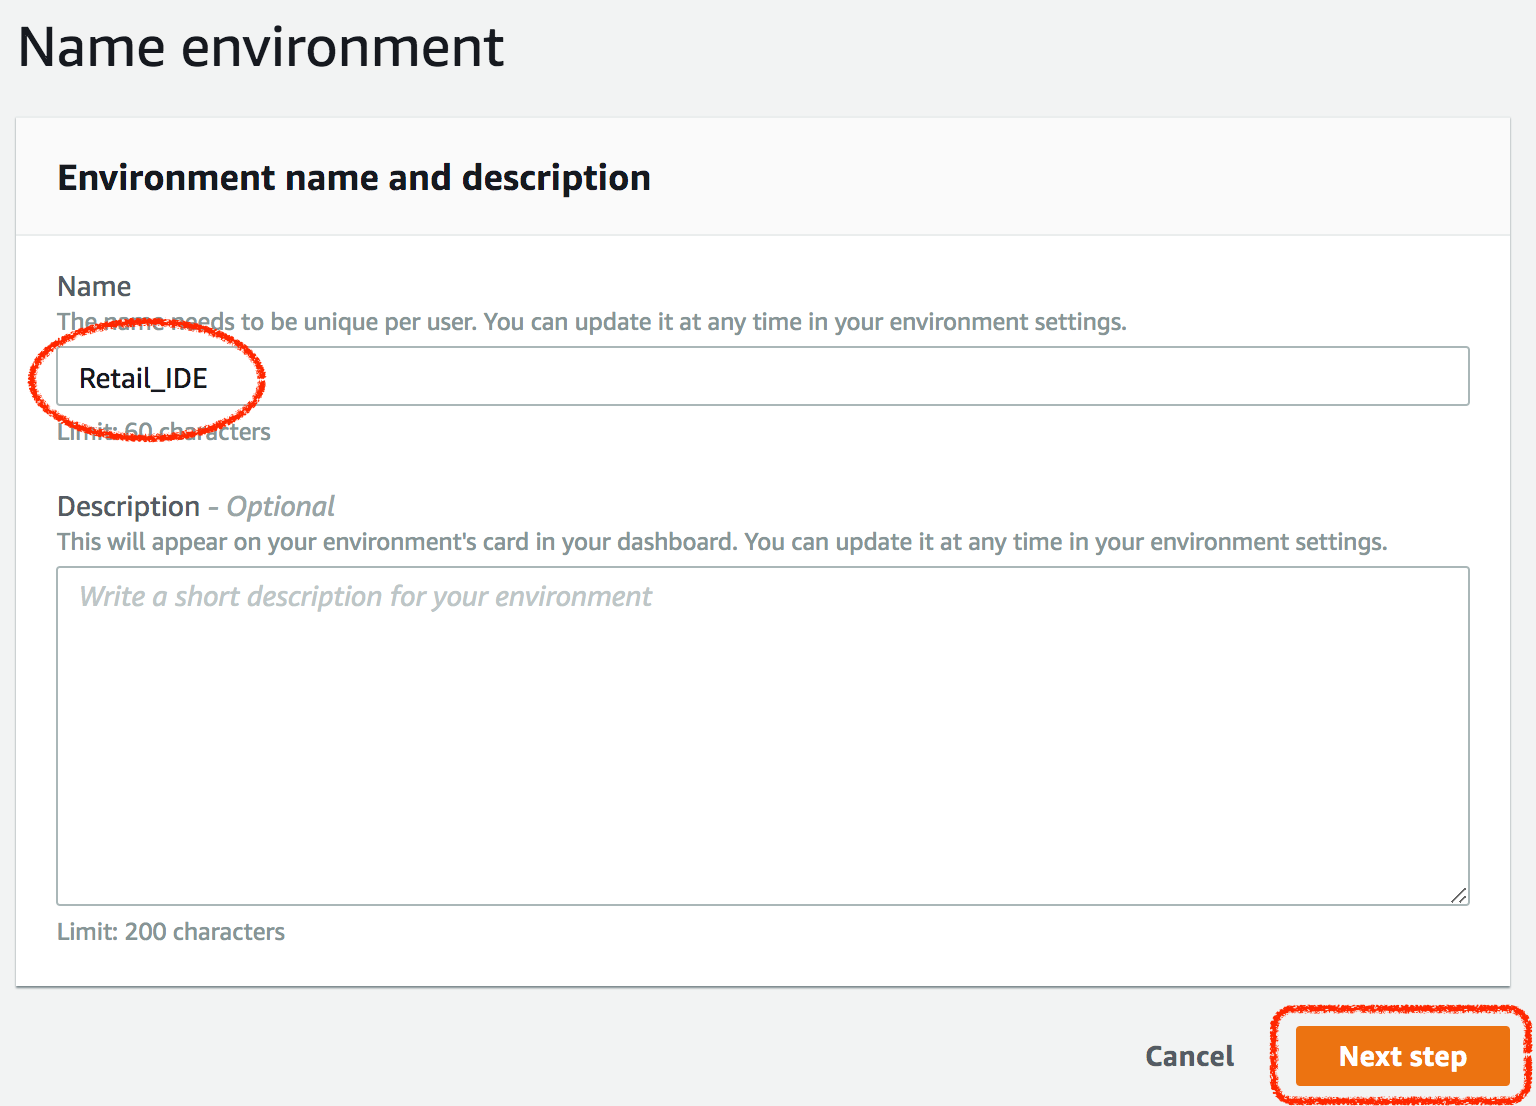
Click on ‘Create environment’
For ‘Name’, enter a something descriptive like ‘Retail_IDE’
Click ‘Next step’
Leave the ‘Environment type’ default option chosen as ‘Create a new instance for environment (EC2)’
For ‘Instance type’ choose ‘t2.small (2 GiB RAM + 1 vCPU)
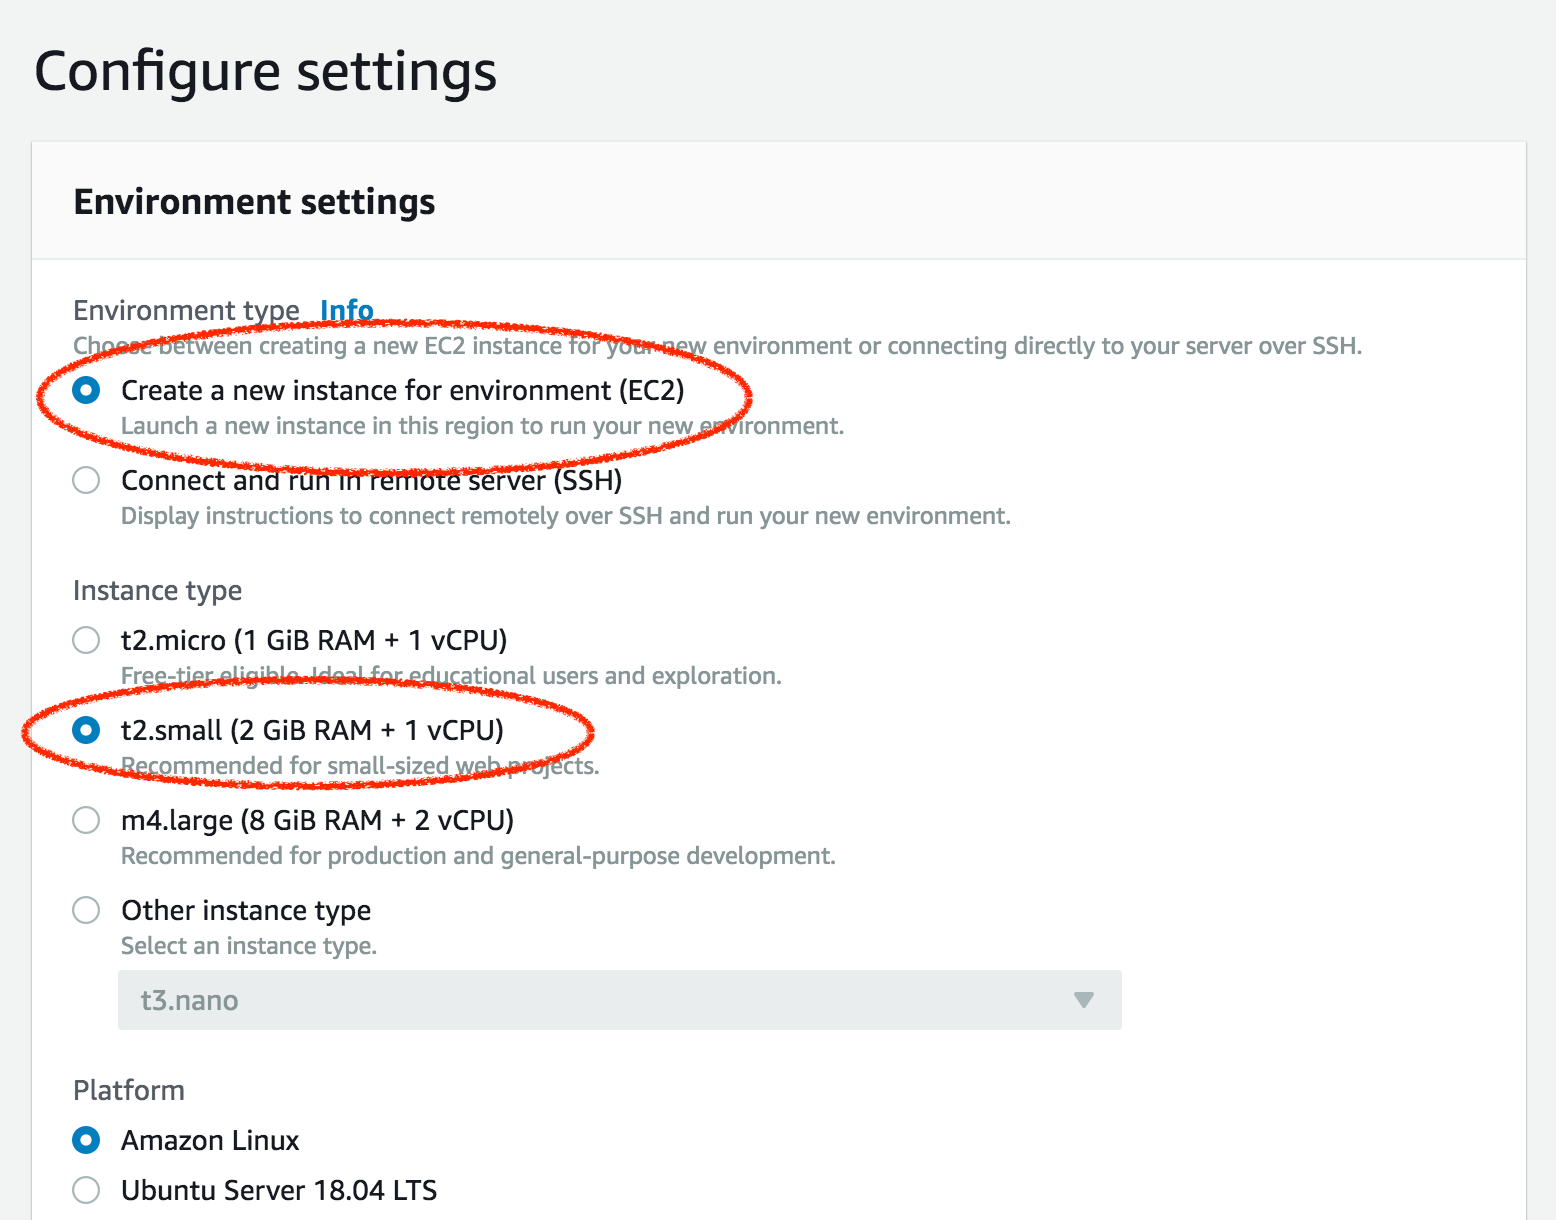
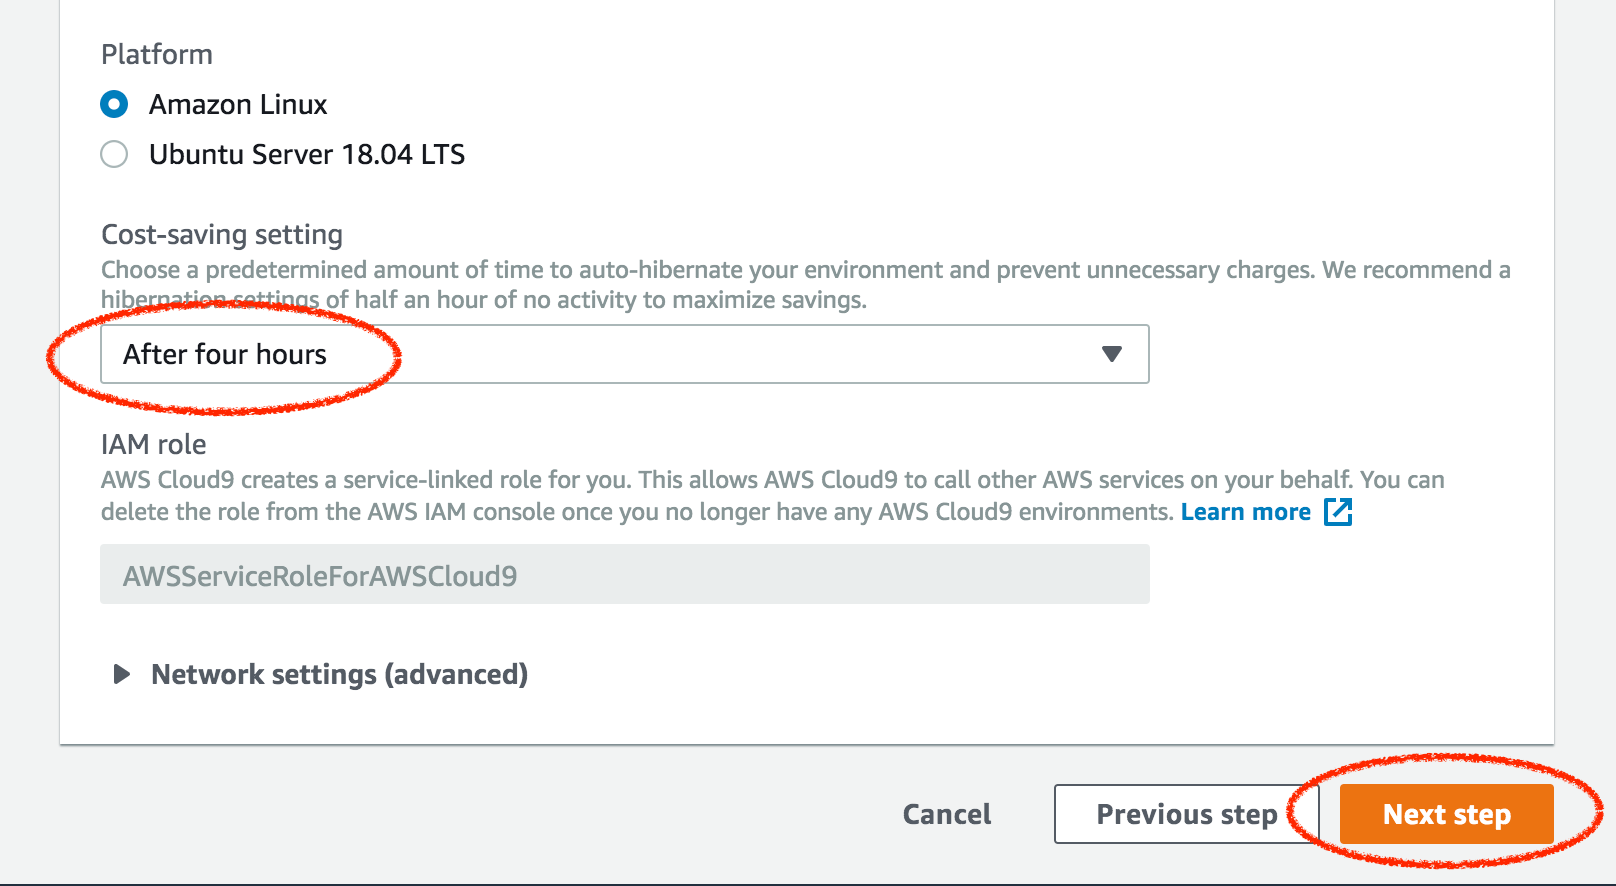
Leave the 'Platform’ option (chosen by default) at ‘Amazon Linux’
For ‘Cost-saving setting’, choose ‘After four hours’
Click ‘Next Step’
In the final configuration screen, scroll down and click ‘Create environment’
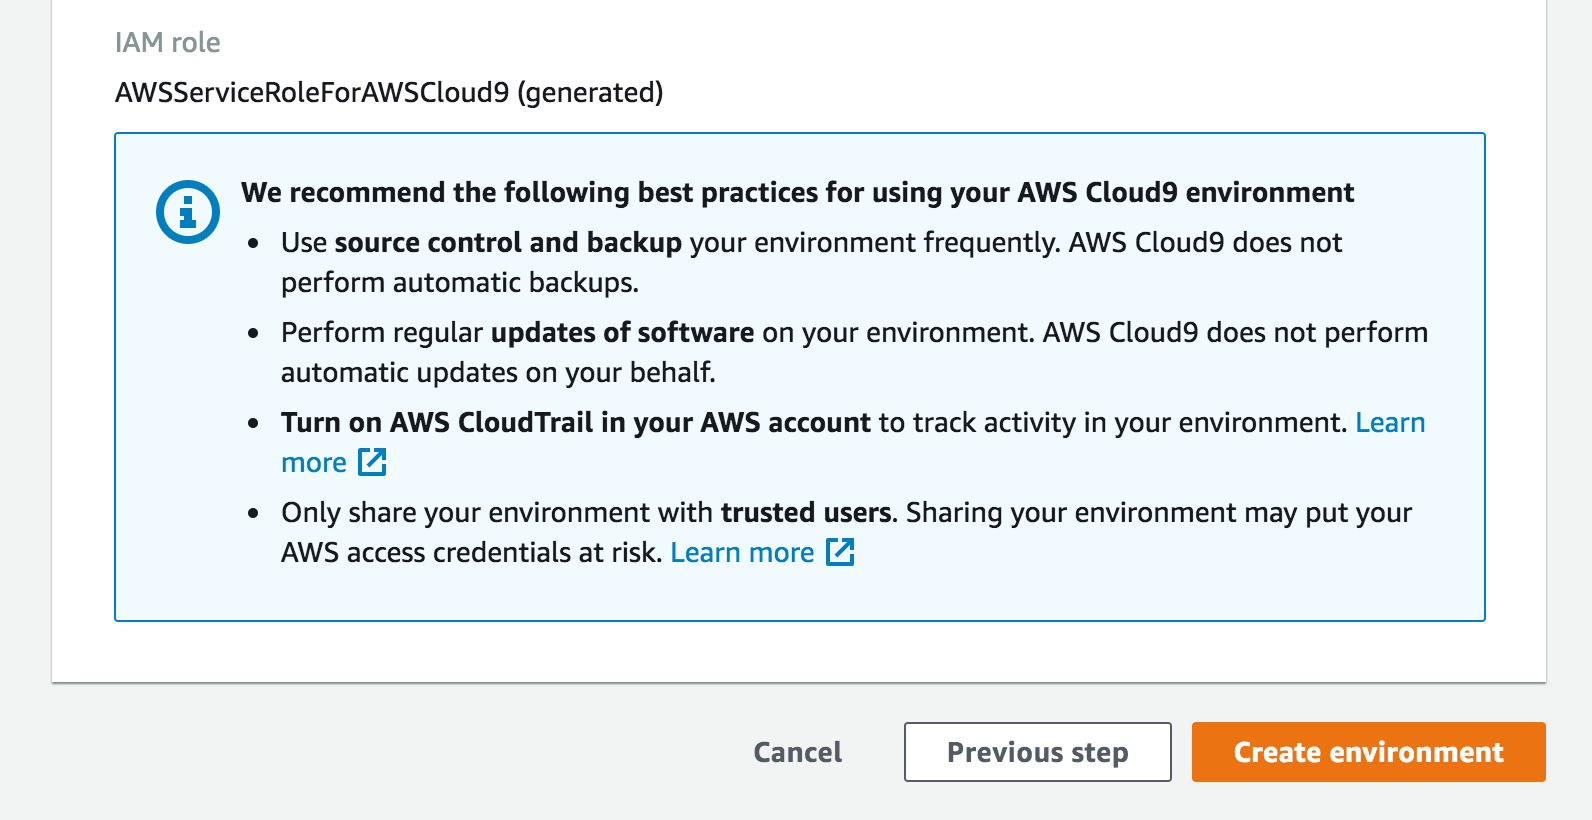
It will take about a minute for the Cloud9 environment to be created.
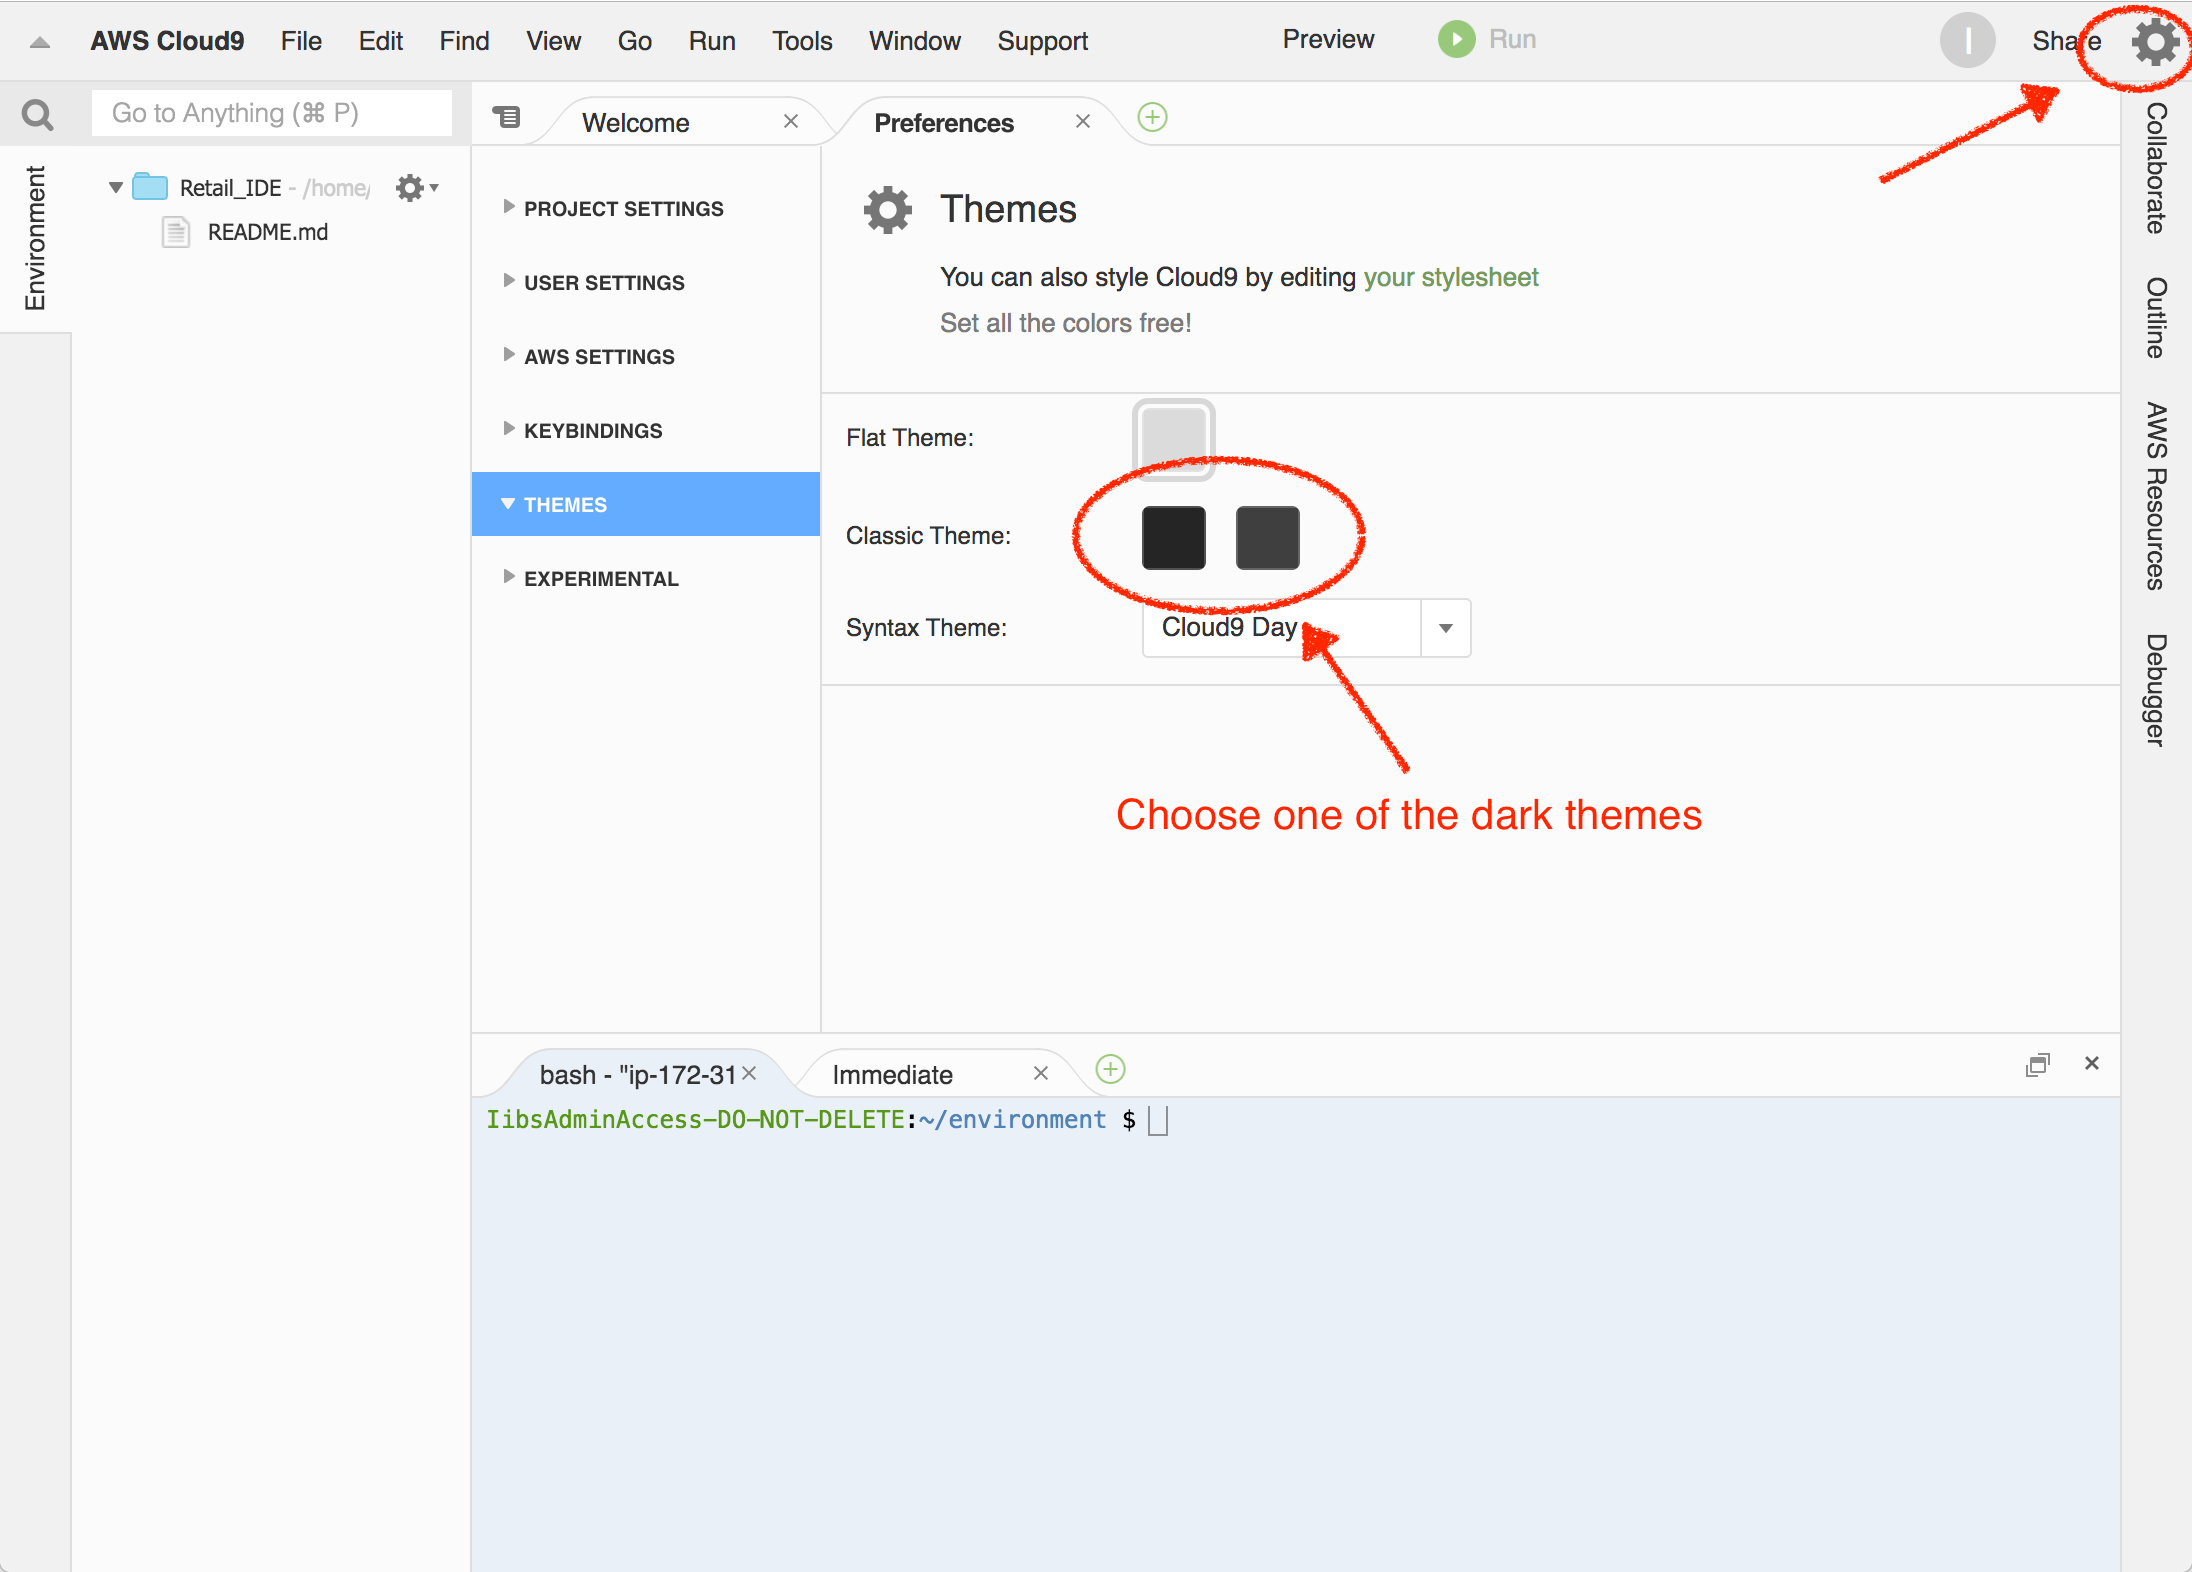
Customize Cloud9 IDE [OPTIONAL]
If you prefer dark themes, click on the settings gear icon in the top right hand corner to open up the preferences pane and choose one of the available dark themes.
Clone the Repo
- In the Cloud9 IDE bash terminal run
git clone https://github.com/amitnarayanan/retail.git
Labs
Once you’ve setup your Cloud9 environment, you can start off working thru' each of the labs below.
Order of Labs
Note Given that 1. training Amazon Forecast predictors and 2. generating forecasts, each takes significant time (around 40 and 25 mins each), we’re going to shuffle the order of the labs and start off with Lab 3. And work thru' other labs, during the training of predictors and then again during generation of forecasts. |
Of course, in a typical production scenario, the order would be: ingest -> process -> store -> analyze -> and forecast.
So, hit up Lab 3 in the link below first. We’ve added cues after each of the two time-consuming steps in Lab 3, so you’ll know when to switch to other labs to allow those steps to finish in the background.
[Ignore anything the below this, including any <style> directives]